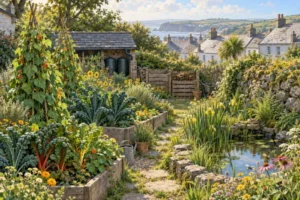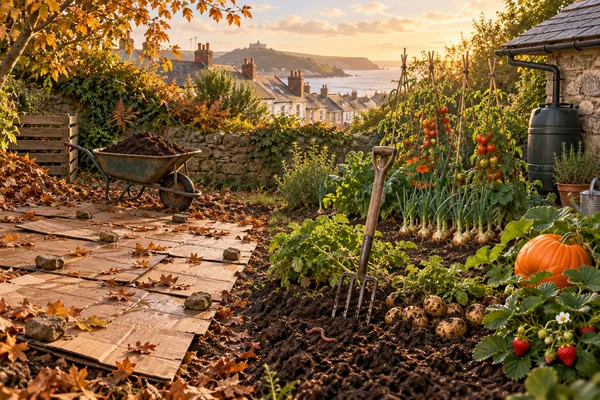
Quick answer: autumn is the best time to start a growing space, because the work you do now happens while nothing is growing. Clear the ground, put cardboard and compost over it, and let the worms do the digging through winter. By spring you have soil instead of a building site. Cornwall’s mild, wet winters and long season make it easy country for growing, as long as you deal with wind and salt. You don’t need much space, good soil to start with, or even to own the garden. Here’s how to go from dead ground to a first harvest.
Every growing space starts with ground that isn’t ready. Compacted lawn, builders’ rubble, gravel over membrane, a yard that grows nothing but couch grass. The good news is that soil is not a thing you buy, it’s a thing you build, and it will do most of the building itself if you feed it and leave it alone. This is the practical version, aimed at an ordinary Cornish garden. The thinking behind it is in our guide to permaculture in Cornwall.
Table of Contents
- Why autumn is the time to start
- Look before you build
- Clearing the ground without digging
- Building the soil
- Beds, raised beds and containers
- What to grow first
- Water, and keeping it
- Personal insights and experiences
- FAQ
- References and resources
Why autumn is the time to start
Start in spring and you’re fighting the season: you want to plant, but the ground isn’t ready, so you dig it over in a hurry and spend the summer weeding. Start in autumn and the calendar works for you. Leaves and spent plants are free organic matter, the soil is still warm enough for life to work in it, and there are five or six months in which nothing needs to be planted. Lay cardboard and compost now, and the weeds underneath die in the dark while the worms pull the compost down.
Cornwall helps here more than most places. Winters are mild and wet, frosts are rare near the coast, and the soil rarely freezes hard, so worms and soil life stay active through the winter. The same mildness means a long growing season at the other end: onions and garlic planted this autumn will be growing quietly while the rest of the country is frozen.
Look before you build
Spend a week noticing your ground before you commit to a layout. Three things decide where the beds go:
- Sun. Watch where the light falls, remembering that the autumn sun is much lower than the summer one. Most vegetables want six hours or more. Leafy crops will take less.
- Wind. This is the Cornish problem. Salt-laden wind will burn young plants and flatten beans. Note where the prevailing wind comes from and what shelter you already have, and put your beds behind it. A filtering windbreak, a hedge or a slatted fence works better than a solid one, which makes damaging eddies on the far side.
- Water. Find the corner that stays wet after rain and the strip that dries out first. The wet corner isn’t a failure, it’s where the pond or the thirsty crops go.
Clearing the ground without digging
Whatever is growing there now, you can kill it without chemicals and without breaking your back. Cut it down hard, then cover it. Cardboard is the standard tool: strip off the tape and labels, overlap the sheets so no light gets through, and wet it thoroughly. Then pile compost, rotted manure, grass clippings or leaves on top, four inches or more. The weeds starve, the worms come up to eat the cardboard, and by spring most of it has gone.
Two situations need more than that. If the ground is capped with gravel and weed membrane, get the membrane out: it strangles the soil and shreds into plastic that never leaves. And if it’s full of rubble, it’s worth sifting the top foot to take out the stones and debris, leaving the smallest gravel behind for drainage. That’s heavy work, once, and everything afterwards is easier for it.
Building the soil
Dead soil isn’t dead for long. It needs organic matter, air and living things, and it will take all three from you in almost any form:
- Compost, home-made or bought. A pair of pallet bays in a corner is enough to start.
- Rotted manure. Stables are everywhere in Cornwall and most are glad to see it go. Local selling pages and Facebook Marketplace are full of free or nearly free loads. Make sure it’s well rotted before it touches plants.
- Leaf mould. Bag up autumn leaves, leave them a year, and you have the best soil conditioner there is, for nothing.
- Kitchen scraps, through the compost heap rather than straight onto beds.
- Green manures in the first year: field beans, phacelia or rye sown on bare ground, then cut down and left on the surface. They hold nutrients over winter and put roots through compacted ground for you.
- Grit, sand, perlite, coir or composted bark where the ground is heavy and airless. These open up the structure so roots and water can move.
Then work on the worms, because they do the job you were going to do with a spade. Keep the soil covered, keep it damp, and keep feeding it. Laying wet cardboard and leaving it to rot is the cheapest worm magnet there is: they come up to eat it and take it down with them. Where there are worms there are channels, air and drainage, and within a couple of years grey compacted ground turns dark and crumbly.
Beds, raised beds and containers
There’s no single right answer, and you can mix all three:
- In the ground is cheapest and holds water best in a dry summer. It suits ground you’ve improved and expect to keep.
- Raised beds give you drainage, a defined edge and a way to garden over rubble or concrete. They dry out faster, which matters less here than almost anywhere. Keep them narrow enough to reach the middle from both sides, about 1.2m.
- Containers and grow bags for anything you might take with you, and for the sun traps beside a wall. Potatoes, salads, herbs and tomatoes all do well in pots.
If you rent, this is the point to check your tenancy and ask your landlord before you change anything structural. Most will agree to beds and a tidy plot. Build what’s movable, improve the soil anyway, and take your containers and water butts with you when you go.
What to grow first
Start with crops that reward beginners rather than the ones with the longest instructions. A good first year for a Cornish garden looks something like this:
- Plant this autumn: garlic and overwintering onion sets. They go in now, need almost nothing, and are ready next summer.
- Potatoes in spring, in the ground or in bags. They crop heavily, break up new ground, and it’s difficult to fail.
- Strawberries in a bed of their own, netted against birds. They come back every year.
- Tomatoes and cucumbers in the warmest, most sheltered spot you have, ideally against a sunny wall or under cover.
- Carrots in the lightest, stone-free soil you’ve made — this is where the sifting pays off.
- Pumpkins and squash if you have room. They sprawl, they smother weeds, and children like them.
Sow less than you think, and stagger it. A dozen lettuces all ready in the same week is the classic beginner’s mistake.
Water, and keeping it
Cornwall is wet in winter and can be surprisingly dry in summer, which is exactly the wrong way round for a vegetable patch. So catch the winter rain: put butts on every downpipe, and link them so the first overflows into the second, and that into the third. Keep the stored water in complete darkness, with lids on and no light reaching it, and it stays clean for months instead of going green with algae. Mulch beds to hold moisture in, water in the evening rather than the middle of the day, and water less often but more deeply. Our rewilding guide covers the pond that belongs in the wet corner.
Personal insights and experiences
I’ve done this the hard way, in a rented garden. It was the back yard of a former student house: gravel laid over several layers of weed membrane, and under that, grey, dead, compacted soil. With the landlord’s permission the gravel and membrane came up, and I hand-sifted the top twelve inches of the whole garden to get out the rocks and rubble, leaving the smallest stones for drainage.
Then the slow part. Three years of feeding it: compost, horse manure from a stable I found on Facebook Marketplace, leaf mould, kitchen scraps and green manures in the first year. Sand, perlite, coir and bark went in to open up the structure. Most of all I worked on bringing the worms back, laying cardboard and keeping it wet so they’d come up, eat it and drag it down into the ground. Three years before the soil was properly alive, and two more before sown grass would survive a winter.
It grows potatoes, tomatoes, strawberries, onions, garlic, carrots, pumpkins and cucumbers now, and it has come together fantastically. None of it needed owning the place. The only things it really needed were permission, patience, and a willingness to let the worms do the digging.
FAQ
Q: When should I start a vegetable garden in Cornwall?
A: Autumn is the best time. Clear and cover the ground now with cardboard and compost, and it will be ready to plant in spring. You can also plant garlic and overwintering onions straight away.
Q: How do I clear ground without digging?
A: Cut everything down hard, cover it with overlapping cardboard with the tape removed, wet it thoroughly, then pile four inches or more of compost, rotted manure or leaves on top. The weeds die in the dark and the worms take the organic matter down for you.
Q: What is the best soil improver for a Cornish garden?
A: Anything organic: home-made compost, well-rotted stable manure, leaf mould and green manures. On heavy, airless ground, add grit, sand or composted bark to open up the structure. Seaweed cast up by storms is a traditional Cornish improver where collecting is allowed.
Q: Can I grow vegetables in a rented garden?
A: Yes. Check your tenancy and ask the landlord before anything structural, then build what’s movable: raised beds, containers and water butts. Improving the soil is a gift to the next tenant and most landlords welcome a tidy, productive garden.
Q: What should a beginner grow first in Cornwall?
A: Garlic and onions planted in autumn, then potatoes, strawberries, courgettes and pumpkins in spring. Tomatoes and cucumbers do well in the warmest, most sheltered corner. Carrots need the stone-free soil you’ve built.
Q: How do I stop water butts going green?
A: Keep the light out. Use opaque butts with the lids on and no gaps, and algae can’t get started. Link butts together so the first overflows into the next, and you’ll catch the whole winter’s rain.
References and resources
- RHS — soil types and how to improve them: www.rhs.org.uk
- RHS — green manures: www.rhs.org.uk
- RHS — raised beds: www.rhs.org.uk
- RHS — making compost: www.rhs.org.uk
- Garden Organic — no-dig growing: www.gardenorganic.org.uk
- Met Office — climate of South West England: www.metoffice.gov.uk
- RHS — windbreaks and shelterbelts: www.rhs.org.uk